Monday, November 12, 2012

A Glimpse of Autumn!

In case you were wondering where Kelly has been?  I'll tell you.
I have been sequestered for the past 6 weeks working like a fiend on 
my new product catalogue!  The rough draft was done for the 
Baltimore TNNA Market in mid-Sept.
Surely, it could go from rough to completed in 2-3 weeks max, 
or so I thought.  Wrong!
Why-oh-why does everything take so long?  
Well, in addition to the canvas pictures, there are close up
pictures of all stitched pieces.
 Also, the catalogue  includes some 
fabulous product and decorating shots!  I got a new
Olympus camera with a macro lenz and it takes
FANTASTIC 
pictures of needlework!
HOORAY!

The good news is:
All 80 pages were sent to press 
T O D A Y !

Hopefully, the book will be at your Retailers by next week!

Here are a few of the Autumn pics for your viewing pleasure:


You'll hear from me next week...
there is a Turkey coming!

Happy Stitching!

Sunday, September 30, 2012

The Koi and a Turkey Preview!

Here is the Profile Shot of this wonderful Koi:
Isn't the height and depth Fantastic?

AS promised, The directions follow:
Step 1:  Assemble Your Supplies.
 The supplies used are: 
1.) Orange sewing thread.(I use either, Molnlycke or Gutermann)
2.) Two shades of 4mm Orange Silk Ribbon.
(I used River Silks #101 & #12)
3.)  A small strip of Orange Felt...any shade will do.
4.) DMC Memory Thread...Orange
5.) Sparkle in Orange from Sundance Designs
6.) A size 24 Tapestry Needle, and a Sharp sewing needle.

Step 2: Cut pieces.
 Cut  3 " lengths of both Memory Thread and Sparkle 

Step 3, 4 & 5: Start the assembly process
Step 3: With the Memory thread, shape your outline for the Koi.
If using the painted canvas..., lay the thread on the painted image,
bending and molding to conform to the outermost shape of the Koi body.
Step 4: Pinch and twist one end of the sparkle thread and tie it firmly with
the sewing thread...leave a good 2 thread tails of 3 inches each.
Step 5: Roll and shape the felt to size of Koi body, then stuff the felt shape 
down the open end of the tube.

Step 6: Attach to canvas 
(In the photo below, I worked in the margin in order to take this shot...
and clearly show how the step looks) 
Lay the pinched end of the tube on painted image, pulling the thread tails 
through and tie down to canvas.  Now, lay the Memory thread shape over 
the top and start to tack down in place.  As you are tacking, catch in the 
sides and edges of the Sparkle stuffed tube.  
(Don't be afraid to really 
smash and mold this into the fish body shape you desire.) 
Cross the lengths of Memory thread over each other at base of fish body, 
smashing the tube flat against the canvas, tacking all in place.  
Curl the excess lengths of Memory thread around a laying tool 
into an elongated spiral.

To Finish:  Ribbon Stitch and Trim
Add Japanese Ribbon Stitches to create dorsal fins at top 
& pectoral fins at bottom. 
The Ribbon stitches for tail should fit around and 
behind the end of the tube.  Trim the Spirals to length of painted 
tail.  Trim the tube to same length.  
Add a black seed bead for fish eye.
To create the Koi 'whiskers', use sharp embroidery scissors. 
 Trim out all of the foil & metallic fibers of tube at 'mouth'.
Trim the remaining hard fibers of tube to desired length.

And that is our Koi!

And now for a few sneak peeks at our Handsome Tom Turkey:


On that Note,
I bid you adieu.
Happy Stitching, one and all! 


Tuesday, September 18, 2012

Kelly's New Sampler, Stumpwork, naturally!

Have you seen my new Sampler?
Below is the painted canvas.
Canvas KCA 021-18
Just wait 'til you see the Dimensional stitching!
 I have published a 20 page Stumpwork Work-book for the Sampler.   
It is designed so you can see and learn the various
dimensional techniques.  No, not a Traditional Stitch Guide.
It shows the steps to create the dimensional elements, and it also has
some thread suggestions.  Also, there are 4 pages of Ribbon-work 
techniques and diagrams.  
As far as background stitches...choose what suits.  
Copy my stitches, or pick your own. Have Fun! PLAY! 
This guy gives new meaning to the term a Snail's Pace!
And Don't you just Love the Koi?  He is Fun and magnificent!
Here are the same images stitched on my Gigantic Stumpwork Sampler:

This picture reminds me that I need to add the little Seed beads to Blue Snails feelers!


Some Lucsious Fruit!  At right is the Strawberry on the large Sampler.
A Fabulous Basket!  
Now comes the fun task of filling my Basket with goodies!
I think this may have to be a little Red Riding Hood Basket filled for Grandma?
Hum?  Decisions, decisions!
On a previous canvas I created a similar Basket and filled it with Stitching tools:
This Stitching Basket is from my Classic Stitching Santa.
(KCN S 100 F, available with Stitch Guide)
Don't you just love the Silver Stork Scissors?

More Berries and some Sweet Peas in a Pod!
This Berry/Peapod is actually taken from a different Sampler I did.
This Bees Skep is also taken from the same Sampler.
For the new Sampler, I am thinking of a different twist...'The Bees will be stitched the same,
but I am thinking of Needleweaving the Bees Skep, naturally.
I'll post a pic when that is done!!!!
In case some of you are curious about the Big Sampler,
Here is a Picture:
There is no painted canvas here.  
I just started stitching, and this is what Grew!
I will leave you with one Fantastic Close-up shot:
I just LOVE this Berry Vine!

And on that Note,

HAPPY STITCHING, all!

Kelly 


Saturday, August 4, 2012

More Stumpwork on Squaw!

The Beautiful Squaw is Completely Stitched!
However, not the background. 
Yesterday was my birthday, and I treated myself to eight
totally focused hours of stitching.  It truly was a treat.  With the sole intent to
finish her.  I wasn't sure when the day started if it could actually be
done, but I had to try!  The background will have to be finished
at a later date.  Now it's time to move onto Mr. Turkey.

The Cornucopia is filled to the brim with Stumpwork Fruit & Veggies!
Notice the Stumpwork arm & hand holding the Basket!

Looking down into the Cornucopia Basket:
I really am proud of how this turned out!  
Now, all I have to do is finish writing all of the directions
and draw all of the diagrams for Lesson 8!
Small task, that!  LOL! No problem?
Y'all know what I'll be doing for the next few days!
Keep on Stitchin' everyone!


Wednesday, July 25, 2012

Needleweaving Re-visited!

The Elegant Squaw Comes to Life!
Now that Lesson 7 part 2 for Jonathon Pilgrim is out of my hair, 
I have finally been able to get down to some
serious stitching on the Squaw.
Isn't she starting to look so pretty?!
Of course her Cornucopia is needlewoven!  How could I not?!
However, The finished Woven Cornucopia above is the second one I wove!
The first time through, I made a few mistakes.  Although it 
looked pretty good, there were a few critical problems...
Let's walk through it:
On the left is the wire frame and warp threads...so far, so good!
To the right, needleweaving has started.  Notice the yellow ochre anchoring thread, which supports the wire frame and keeps it from collapsing down onto the canvas.
Below is the first finished basket.  
Looks pretty good, right? 
 Here is the problem...It was late at night and I was so hyper-focused 
on the weaving that I forgot to use the padding to shape the basket
prior to weaving.  Consequently, I used very tight tension on my weft 
weaving threads.  It made for very neat weaving.
The problem was there was no distance between the weaving 
and the canvas.  Then, when I cut the anchoring wire, 
the tension was so tight, that the wire flattened right 
back against the canvas. 
Soooo,
I un-wove the weft and started over!
(Ever thrifty, I wanted to conserve the warp threads, if possible!)  


On the left, this photo is back to the warp stage. The difference 
is the padding which provides shape to the basket.   
The padding will be removed after weaving.  The great
thing with the padding is that it really helps you keep your
tension accurate to allow the proper space between the
basket and the canvas! 
On the right, the second time I used 3 different anchoring 
threads to keep the wire in place, and support the structure. 
Below, close-up of the final basket!
It has lovely shape and lift from the canvas. 
The other part of the canvas which I am very excited about is the
fringe and beading at the hem of the dress:

When I stitched the fringe and added the silver
beading trim...it needed something...a bit more
weight?  But what?
I tried the over-dyed green magnifica beads...
and wa-lah!
 The perfect touch!

Thursday, June 7, 2012

Kelly goes Stumpwork Crazy!!!

Hello All!
I am on a role with the stumpwork!  
I just COULD NOT WAIT to SHARE these images!!!

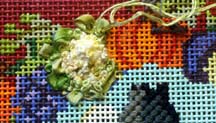
 A Fancy New Cauliflower!
Which began as a small piece of felted wool,
scrunched and couched in place:
The wool is covered with Knots in 2 shades of Cream:
Now we move out a bit and add Silk Ribbon:
(Notice there is a gap between the silk and the padded knots)
Now we expand the knot brigade outward to reach the ribbon
and start to fill in crevices.  Also we picked up three additional
shades of Cream...ranging from Celadon Shoot to Vanilla Bean to Dried Thyme:
A bit more silk, and another crop of Knots:
The finished work is a Vegie Delight!

Wait!  There is more to Show:
A Fabulous White Winter Gourd!
Working on the Cauliflower with photo images on my lap-top.
Google Images...my handy reference!
Our gentleman holding his Rifle...his handsome Hunt Satchel
And the magnificent Wild Turkey!


Stay Tuned!
Happy Stitching!
Kelly