Showing posts with label Wampanoag Indians. Show all posts

Tuesday, January 15, 2013

2012 Finishes!


The Tree Club: Seven Trees Stitched


in Early Months of 2012


January 2012
Elegant Rebekkah Pilgrim

May 2012 
Indian Scout

October 2012
Witch's Tools

November 2012
Dark Star Little Present
 

December 2012
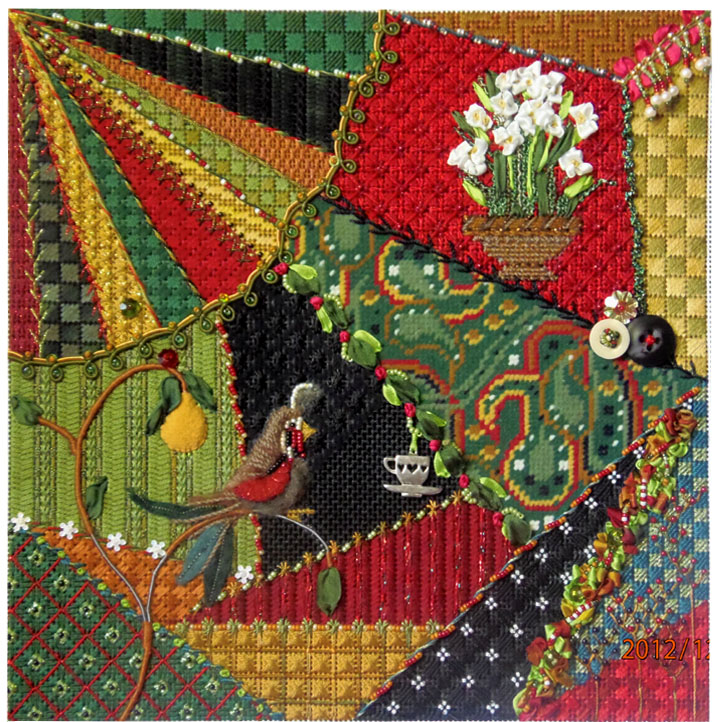
Christmas Crazy Quilt                                

2012 Work In Progress Projects:

The WIPs...these took alot of my time, writing lessons, stitching, working
out the threads and stitches, etc.  The only thing left to do is background 
and a bit of work on the Garlands!

Jonathon Pilgrim

Indian Squaw:

Elegant Turkey

Sweet Pea Sampler

And so into 2013, 
I will continue to work on the
WIP's!

Happy Stitching, All!
Kelly


Saturday, August 4, 2012

More Stumpwork on Squaw!

The Beautiful Squaw is Completely Stitched!
However, not the background. 
Yesterday was my birthday, and I treated myself to eight
totally focused hours of stitching.  It truly was a treat.  With the sole intent to
finish her.  I wasn't sure when the day started if it could actually be
done, but I had to try!  The background will have to be finished
at a later date.  Now it's time to move onto Mr. Turkey.

The Cornucopia is filled to the brim with Stumpwork Fruit & Veggies!
Notice the Stumpwork arm & hand holding the Basket!

Looking down into the Cornucopia Basket:
I really am proud of how this turned out!  
Now, all I have to do is finish writing all of the directions
and draw all of the diagrams for Lesson 8!
Small task, that!  LOL! No problem?
Y'all know what I'll be doing for the next few days!
Keep on Stitchin' everyone!


Wednesday, July 25, 2012

Needleweaving Re-visited!

The Elegant Squaw Comes to Life!
Now that Lesson 7 part 2 for Jonathon Pilgrim is out of my hair, 
I have finally been able to get down to some
serious stitching on the Squaw.
Isn't she starting to look so pretty?!
Of course her Cornucopia is needlewoven!  How could I not?!
However, The finished Woven Cornucopia above is the second one I wove!
The first time through, I made a few mistakes.  Although it 
looked pretty good, there were a few critical problems...
Let's walk through it:
On the left is the wire frame and warp threads...so far, so good!
To the right, needleweaving has started.  Notice the yellow ochre anchoring thread, which supports the wire frame and keeps it from collapsing down onto the canvas.
Below is the first finished basket.  
Looks pretty good, right? 
 Here is the problem...It was late at night and I was so hyper-focused 
on the weaving that I forgot to use the padding to shape the basket
prior to weaving.  Consequently, I used very tight tension on my weft 
weaving threads.  It made for very neat weaving.
The problem was there was no distance between the weaving 
and the canvas.  Then, when I cut the anchoring wire, 
the tension was so tight, that the wire flattened right 
back against the canvas. 
Soooo,
I un-wove the weft and started over!
(Ever thrifty, I wanted to conserve the warp threads, if possible!)  


On the left, this photo is back to the warp stage. The difference 
is the padding which provides shape to the basket.   
The padding will be removed after weaving.  The great
thing with the padding is that it really helps you keep your
tension accurate to allow the proper space between the
basket and the canvas! 
On the right, the second time I used 3 different anchoring 
threads to keep the wire in place, and support the structure. 
Below, close-up of the final basket!
It has lovely shape and lift from the canvas. 
The other part of the canvas which I am very excited about is the
fringe and beading at the hem of the dress:

When I stitched the fringe and added the silver
beading trim...it needed something...a bit more
weight?  But what?
I tried the over-dyed green magnifica beads...
and wa-lah!
 The perfect touch!

Wednesday, May 30, 2012

Pilgrim Gent & Indian Brave

Well Hello Stitchers!  I had every intention of blogging last night.  In fact I even told Colleen,
"I'm fixin' to blog here in a little bit!"  (Can y'all hear the Texas?  What has become of this Ohio Girl?)  Anyway, somehow I got completely distracted and didn't.  Now, for the life of me, I can't figure out why, or what happened?  Could it have been my three swimmers all having time trials at different times all evening from 4:30 'til after 7?  Could it have been hubby calling at eleventh hour to say he was working late?  Could it have been my 6th grader coming to me in tears and saying I had forgotten to turn in her paperwork for next school-years volleyball team, and she didn't get her uniform yesterday like all of her friends?
(Never mind that she didn'texactly give me the paperwork, and it's her job to turn in the paper-work...I am not a middle-schooler!!)  ARGH!!!!  Nah, couldn't have been any of that!
I am so thrilled with how well he is turning out.  He is the perfect counter to our Elegant Rebekkah!  Although he is not fancy, by any means, there is a simple Classic Elegance to his costume.  The jacket actually looks like a gorgeous brocade cloth, which would have been woven in Belgium and purchased in London.  His bride would have hand embroidered the silk leaf treatment around the hem of his coat.  The rifle looks so Cool!  It was an item that had me stumped for a while and yes, I did rip it out twice before arriving at the perfect thread and stitch combination!
Adding the final button-hole wrap stitch to hat-brim.
Hat Finished, with buckle and scrunched silk hat-band.  Gorgeous!
Some of you may be wondering why you don't see any garland or background stitching?  Well, I am trying
something a little different than my normal stitching method.  In order to stay on the established Lesson schedule, it occurred to me that I would just focus on 'new stitching' for the next 2 characters.  In other
words, stitch the characters, their costume & accoutrement, then go back and stitch the backgrounds!
To finish up this post, I thought I would show a few close-ups from Indian Brave

Beaded and wrapped moccassins.
Corn silks added to beaded field corn.
Look at all of his beading!


So Elegant Thanksgiving Fans, until next time,
Happy Stitching!
Kelly


Saturday, May 12, 2012

Indian Brave is STITCHED!

HOORAY!
After a grueling 32 hour Marathon stitching & writing session,
(which began in earnest Friday evening after Olivia's Brownie Meeting)
I just now put the final stitch in!!!!


This was my Eveready Bunny piece...it just kept going and going!
I am so HAPPY he is done!  
He is rather Handsome and well adorned!
Lesson 6 will be e-mailed to the Elegant Thanksgiving Stitch Clubbers tomorrow!!!
Details to follow....
I am now going to get some much needed sleep!
Happy Mothers Day everyone!!!!!

Wednesday, March 21, 2012

A Tisket, A Tasket, How to Stitch a Basket!

An Elegant Basket of Bounty!
This was stitched way back in the fall, but I somehow misplaced 
the photos!  Yesterday, I was looking through my archived stitching 
photos for something else entirely, and 
ran across the Basket Step-by-step pics!
Even if you aren't stitching with us on the Elegant Thanksgiving, 
the pics are quite helpful for any needle-weaving project! 
STEP 1
Memory wire was used to create the shape for the Basket.  
Also, as the top row of the Basket, Memory wire provides a wonderful 
stability during weaving.
After securing the memory wire, the first color of the Warp threads 
are set in place.  The golden thread loops the wire and goes back down.
STEP 2
The Warp has a second color, brown this time.
STEP 2
 More of the brown is in!
STEP 3
Now that all of the Warp threads are set in place, it is time
for the weft weaving.  This basket uses an 
'Over-2, Under-2' weave sequence...
Notice how the needle lays 
Over the brown threads and Under the golden threads!
STEP 3 Complete
All of the Needle-weaving is done!
STEP 4
Using the brown, a row of Buttonhole Wrap Stitches is 
done across the top.
This step gives a finished look to the rim of the Basket!
FINAL
And here is our lovely Basket brimming with Bountiful Harvest for THANKSGIVING!

Never fear, The Brave is coming along.  We took the kids to the Beach at North Padre for Spring Break last week and I stitched on him like a fiend!  Yesterday I worked on Brave from 1:30 in the afternoon until after midnight!  My goal is to finish him by the end of the week!  I wish I could finish him today, but I don't want to set up for failure, 
in case I don't make it!
A Few Pics from Brave Stitching:

Another Eggplant!
Catch of the Day...still stitching!
 Lovely Woven Grass Column!

Sunday, February 26, 2012

Indian Scout is coming to life!

Wampanoag Scout


Well I know y'all thought I had fallen off of the Planet!
In a way I did...
but we won't get into that now.
Suffice it to say that life got in the way for awhile, and I have had
very little time or energy for any of the Fun stuff, like stitching,
blogging and writing.  
However, as you can see from the above picture,
I am Back!

LESSON 4
Is the first Lesson on our Scout.  The lesson has been written,
and the kits for Lesson 4 are winging their way from Austin!
The Scout is well under way.  The past 24 hours I got alot of stitching in,
as I was in Galveston, TX at the lovely Historic, Hotel Galvez for the
Lonestar Guild's Annual Stitcher's Retreat.
Great Friends, fantastic food,  amazing stitching at a fabulous location!
What could be more relaxing?
A Stitcher's idea of Paradise!

 These Tall pines are stitched differently than background trees on Rebekkah.
I was so excited to work the beading that I just had to start here!
Bad news, though.  The beading will be in Lesson 5!
So everyone has to wait!
Sorry, all.  There is just too much background work to do first!
The Ground is a bit different than Rebekkkah, as well.
The corn cobs are highly padded prior to beading. 
Oh what a difference some beads and
a length O'Silk Ribbon Makes!


Well, that is all for now.
I promise not to wait so long to blog again!
Happy Stitching, All!